Migrate data into Fauna with new data import feature
We're excited to announce the general availability of data import, which will enable you to import sample data or exported data from your existing databases. You can upload multiple CSV or JSON files to new or existing Fauna collections while defining the data type for each imported field.
In this blog post, you learn how to use Fauna’s import feature to import the contents of JSON and CSV files directly into Fauna collections. With the import feature, you can also import multiple files at once. In this case, each file becomes a separate collection in Fauna.
Let’s go ahead and explore how this feature works. Head over to the Fauna dashboard and create a new database.
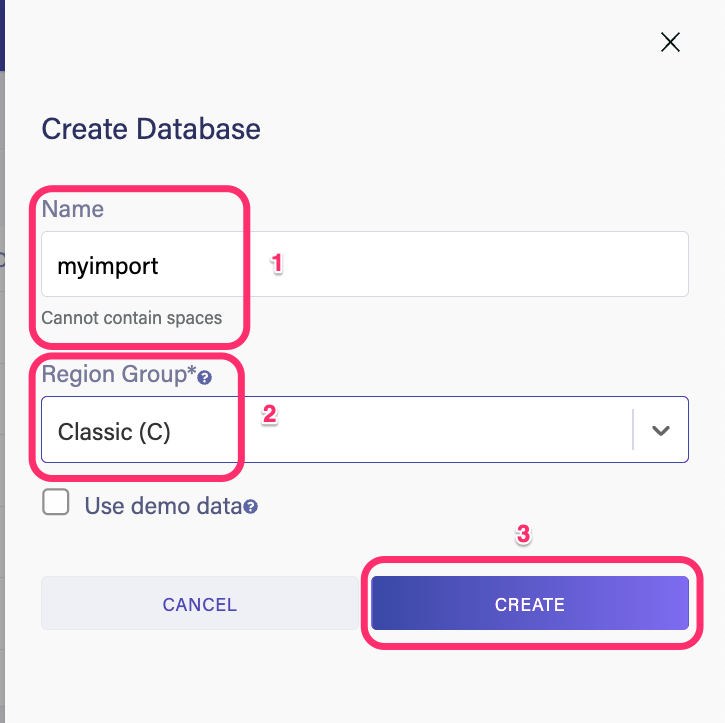
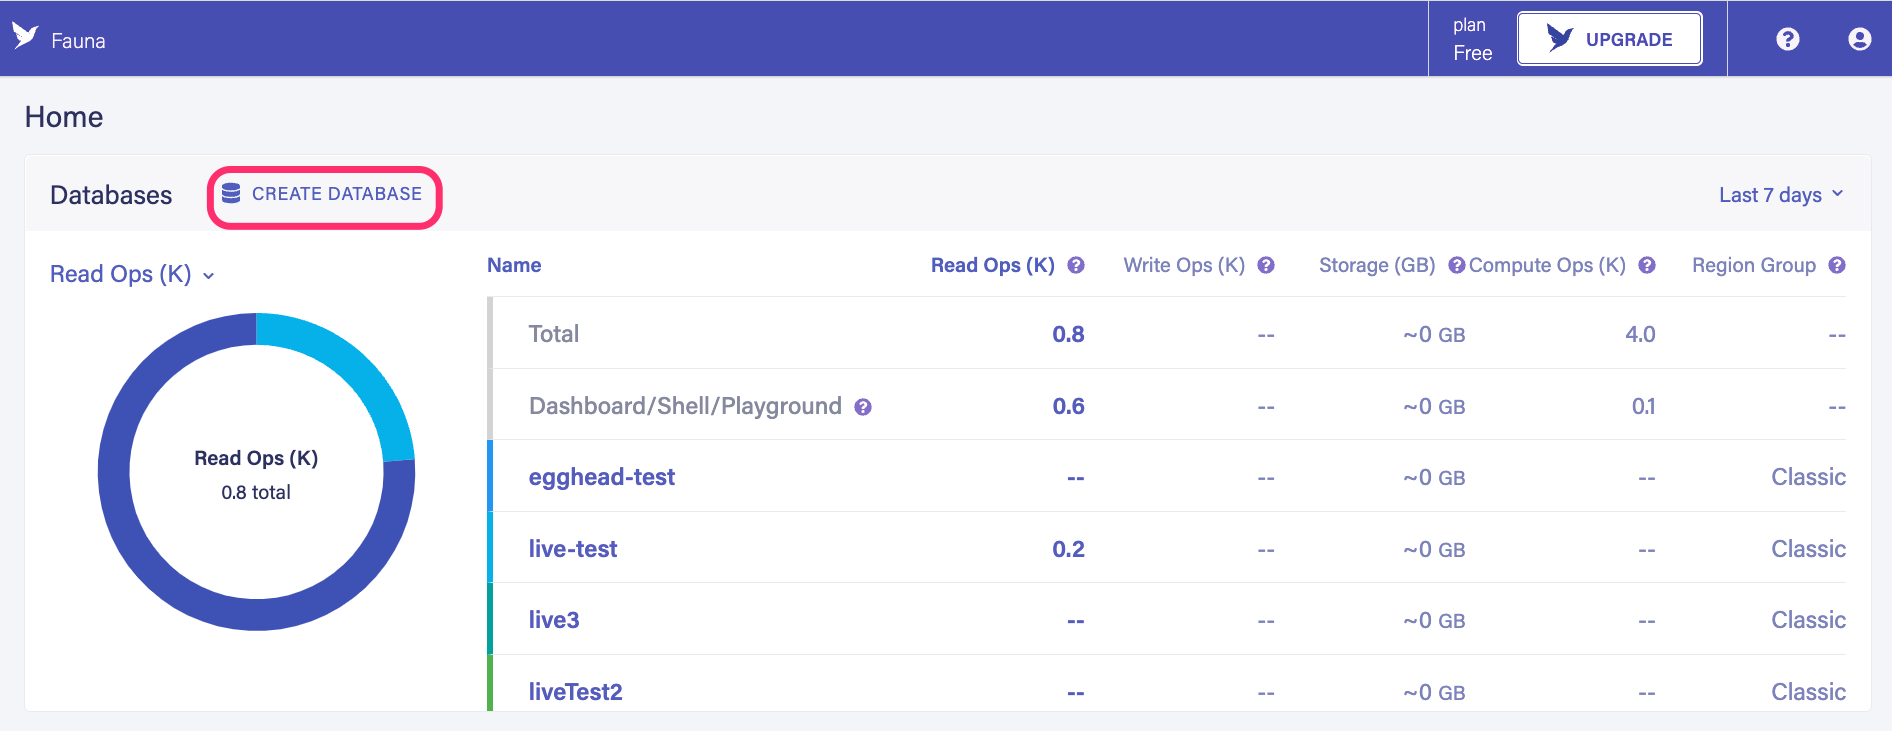
Give your database a name and select a region group. For this demo, choose classic.
Next, navigate to Security > Keys > New Key to create a new admin key for your database. Select the Admin option as the role and select save.
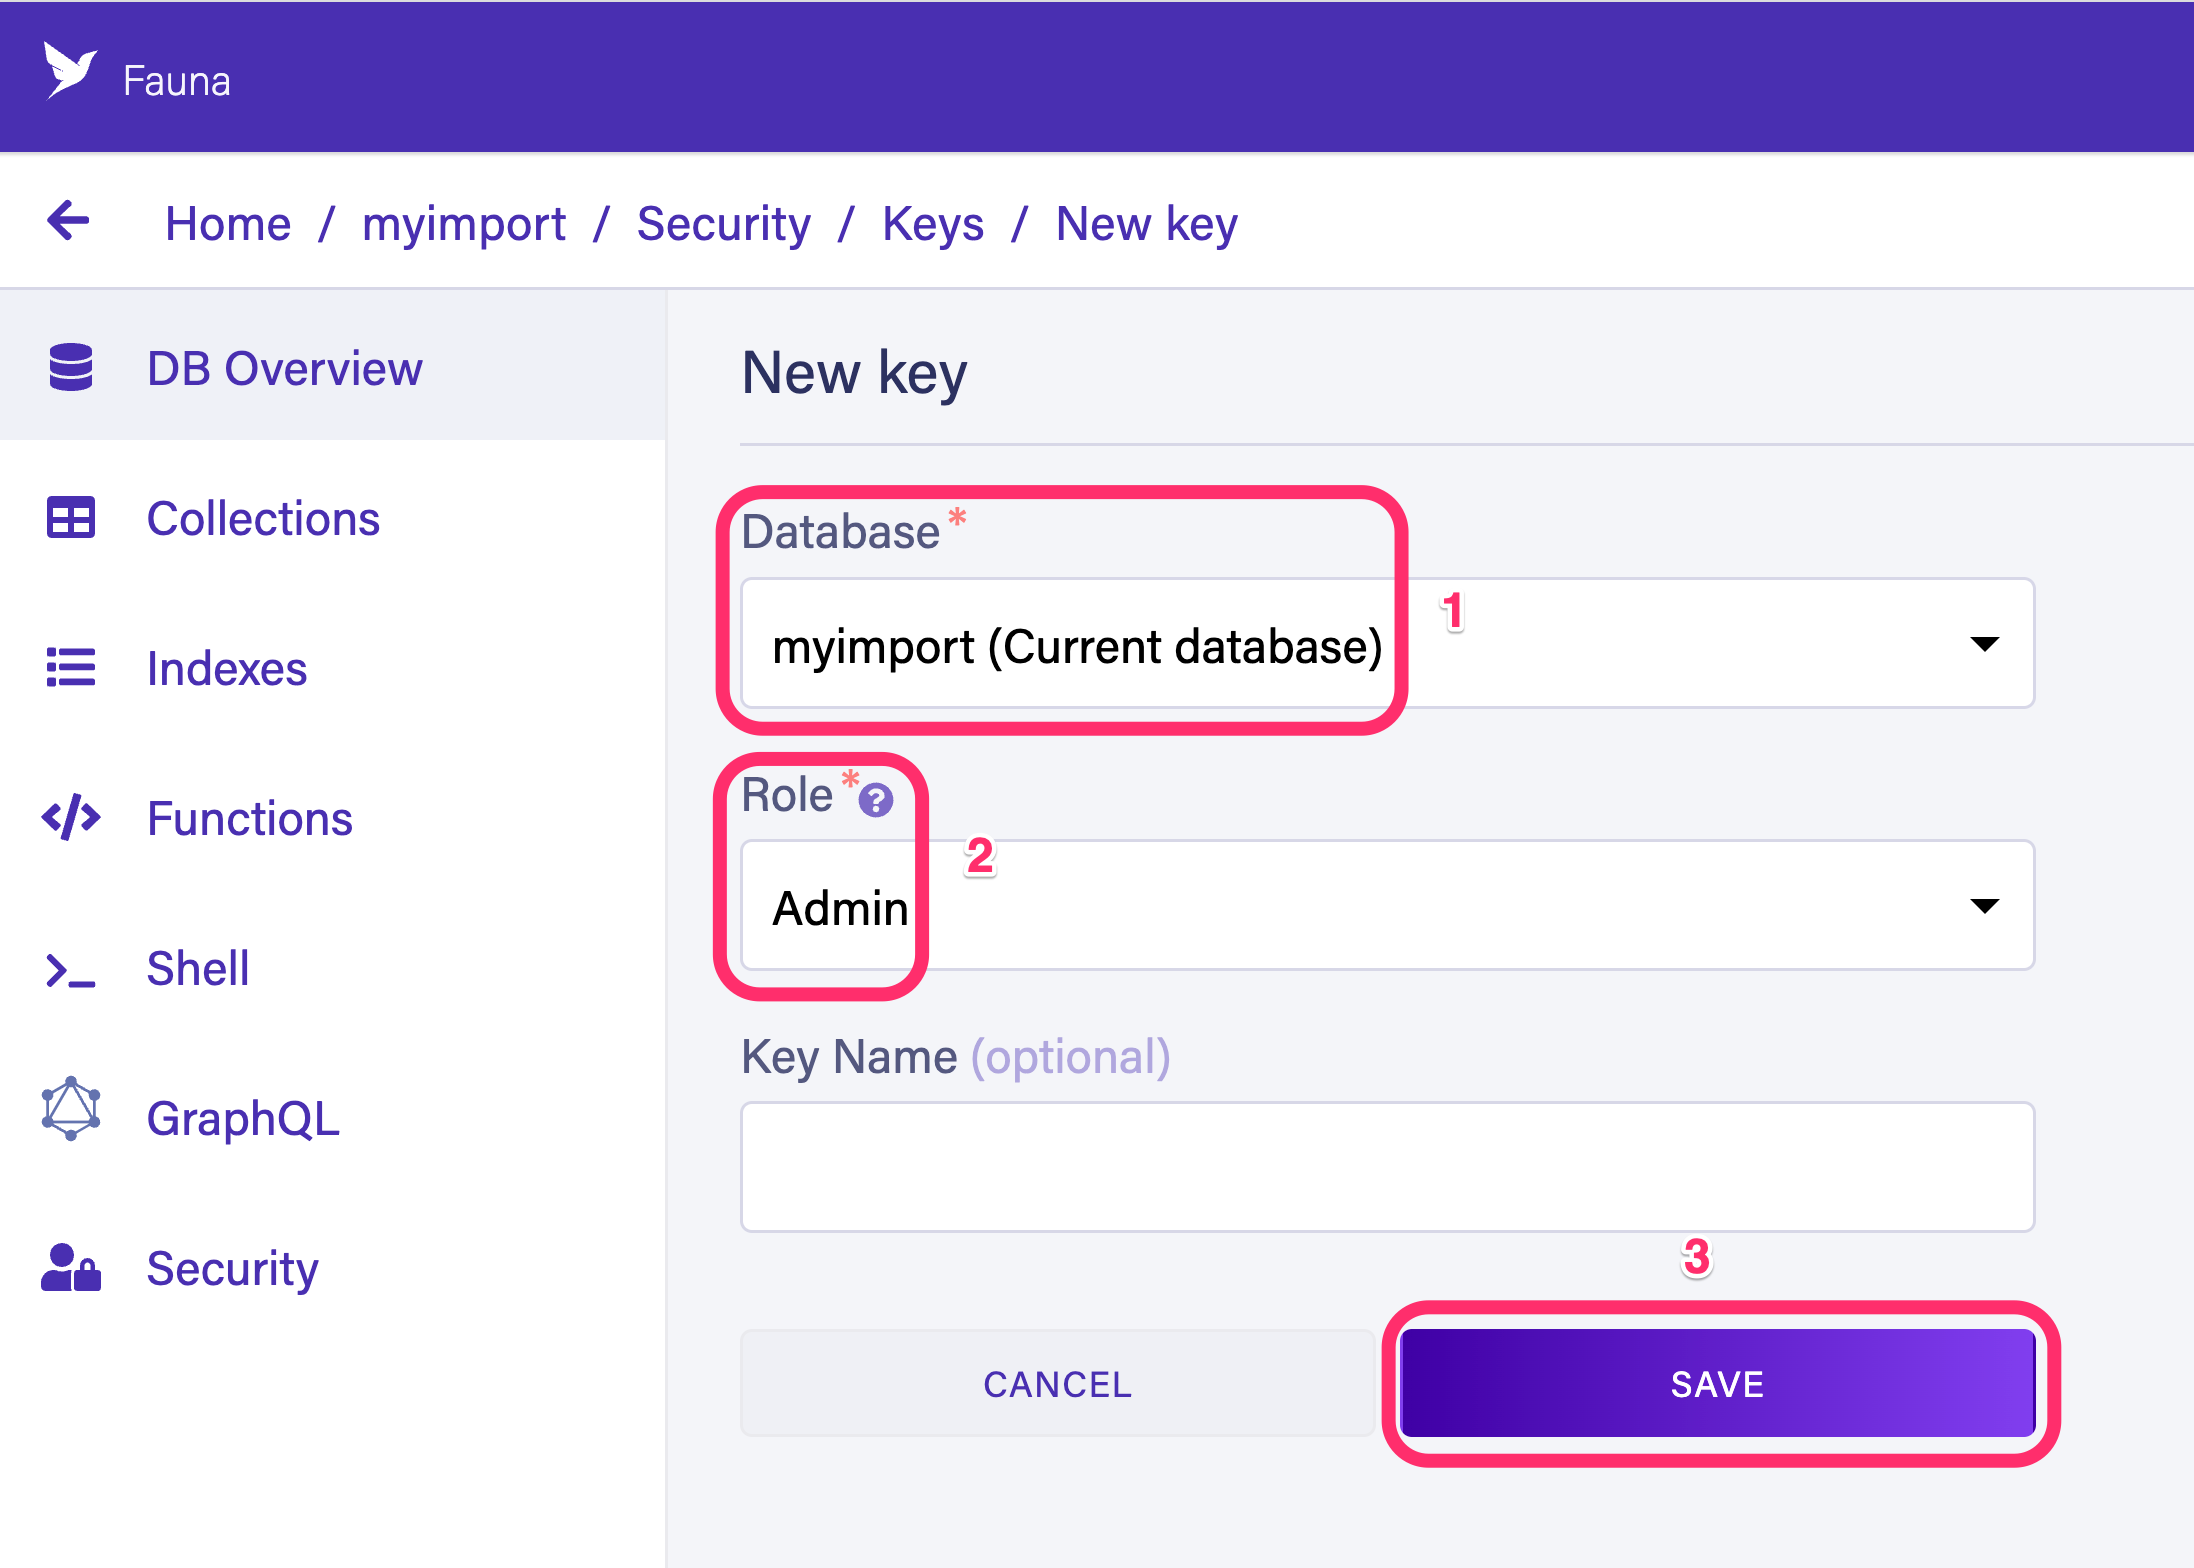
Copy the generated key and save it in a secure place.

Next, install the fauna-shell npm package by running the following command.
npm install -g fauna-shellThis package lets you interact with your database directly from your terminal or a node script. You can learn more about this package on the documentation site.
Next, log in to your database from your terminal by running the following command.
fauna cloud-loginSelect the following options when prompted.
? The endpoint alias prefix (to combine with a region): cloud
? How do you prefer to authenticate? Secret
? Secret (from a key or token): fnxxxxxx...
? Select a region Classic
Enter the admin key generated in the previous step for the secret selection. Select the region where you created your database. You are now ready to import data.
Importing JSON data
Create a new file called zipcodes.json and add the following contents.
[
	{ "zipcode" : "01001", "city" : "AGAWAM", "pop" : 15338, "state" : "MA" },
	{ "zipcode" : "01002", "city" : "CUSHMAN", "pop" : 36963, "state" : "MA" },
	{ "zipcode" : "01005", "city" : "BARRE", "pop" : 4546, "state" : "MA" },
	{ "zipcode" : "01007", "city" : "BELCHERTOWN", "pop" : 10579, "state" : "MA" },
	{ "zipcode" : "01008", "city" : "BLANDFORD", "pop" : 1240, "state" : "MA" }
]
Notice that this is an array of JSON objects. Each JSON object will become a document in the target collection. By default, the name of the file becomes the collection name inside Fauna.
Run the following command to import this data to your database.
fauna import --path=./zipcodes.json # result
Database connection established
Start importing from ./zipcodes.json
Average record size is 75 bytes. Imports running in 10 parallel requests
5 documents imported from ./zipcodes.json to zipcodes2
› Success: Import from ./zipcodes.json to zipcodes2 completed
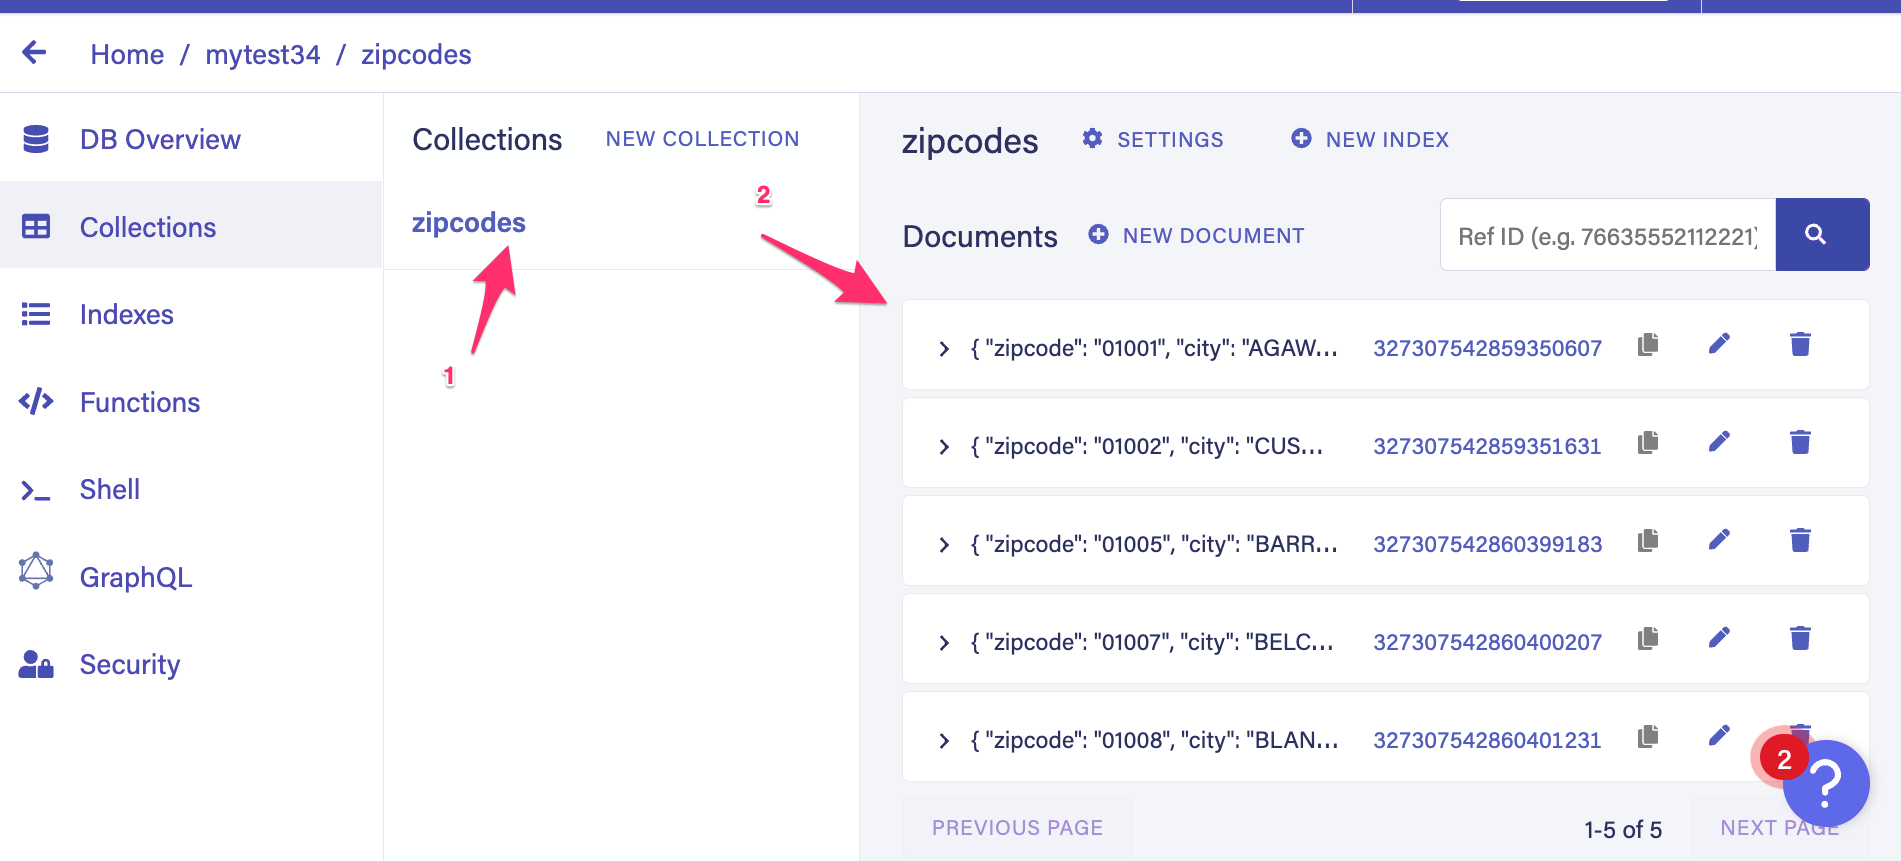
Navigate to your database from the Fauna dashboard. Notice you have a new collection called zipcodes and each JSON object from the array is added as a document in zipcodes collection.
Import JSON data to an existing collection
Create a new collection called Location in your database. Run the following command to add the contents of zipcodes.json to the Location collection.
fauna import \
  --path=./zipcodes.json \
  --collection=Location
# result
Database connection established
Start importing from ./zipcodes.json
Average record size is 75 bytes. Imports running in 10 parallel requests
5 documents imported from ./zipcodes.json to Location
› Success: Import from ./zipcodes.json to Location completed
The --collectionflag specifies that you are trying to add the documents to a specific collection. However, if the collection you are trying to add the documents to already has data, you must pass along the --append flag.
The following command will append the zipcodes to a non-empty collection called Address
fauna import \
  --path=./zipcodes.json \
  --collection=Location \
  --append
Import data from a CSV file
CSV is another commonly used format to save data. As all spreadsheet applications support CSV, developers often work with CSV. With the import feature, you can effortlessly import your CSV files into your database.
Create a new comma-separated file zip2.csv and add the following contents to it.
"zipcode","city","pop","state"
"01001","AGAWAM",15338,"MA"
"01002","CUSHMAN",36963,"MA"
"01005","BARRE",4546,"MA"
"01007","BELCHERTOWN",10579,"MA"
"01008","BLANDFORD",1240,"MA"
Run the following command to import the CSV data to your database.
fauna import --path=./zip2.csv# Result
Database connection established
Start importing from ./zip2.csv
Average record size is 76 bytes. Imports running in 10 parallel requests
5 documents imported from ./zip2.csv to zip
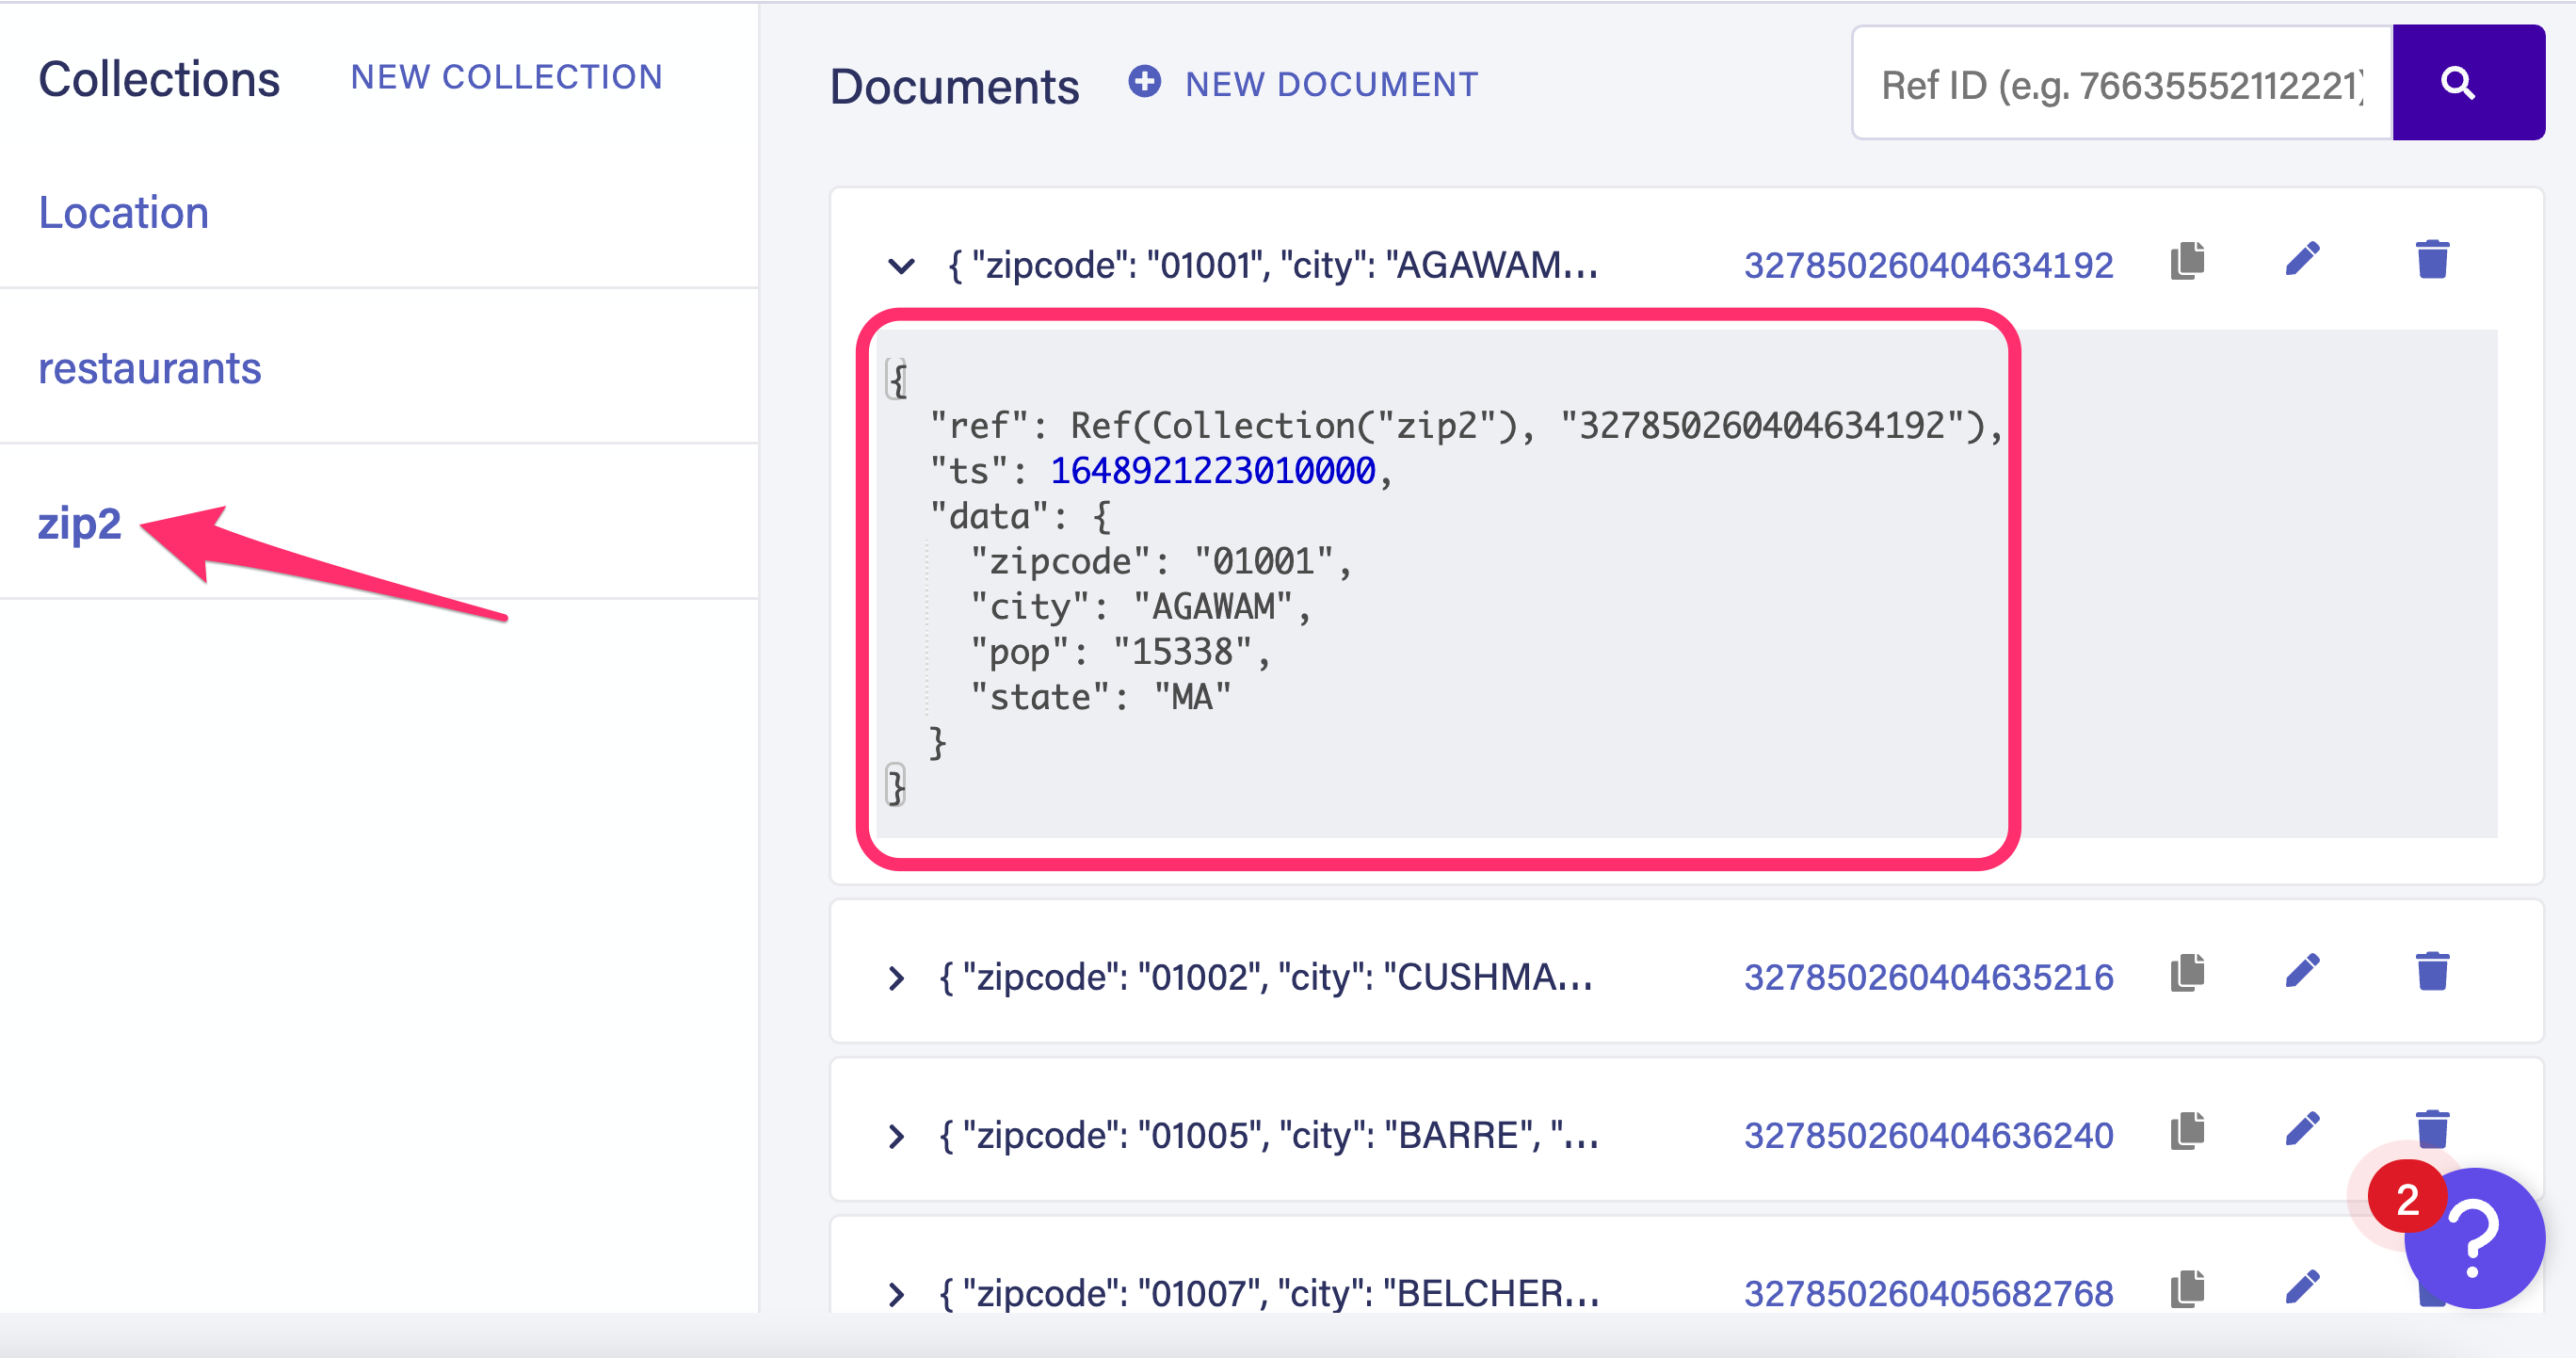
› Success: Import from ./zip2.csv to zip completedGo back to the Fauna dashboard and notice that a new collection called zip2 has been created and documents added to the collection.
If you want to append the data to a specific collection, you can specify it with the --collection option, as seen in the previous JSON example.
For instance, you can run the following command to append the CSV data into Address collection.
fauna import \
  --path=./zip2.csv \
  --collection=Address \
  --append
🤔 CSV files without a header row
Notice that the CSV file used in the previous example has a proper header row defined. What if the CSV file didn't have a header row? The import tool always assumes the first row as headers. Therefore it turns the first row into document keys in such a scenario.
Import the following CSV file with no header.
"01001","AGAWAM",15338,"MA"
"01002","CUSHMAN",36963,"MA"
"01005","BARRE",4546,"MA"
"01007","BELCHERTOWN",10579,"MA"
"01008","BLANDFORD",1240,"MA"
Only 4 documents are added to your collection in this scenario, and the first row becomes the document keys.
Your imported document looks as follows.
{
  "ref": Ref(Collection("zip_no_header"), "327851255850336849"),
  "ts": 1648922172343000,
  "data": {
    "15338": "36963",
    "01001": "01002",
    "AGAWAM": "CUSHMAN",
    "MA": "MA"
  }
}
Import data with specific type-conversion
You have the option to define the data type of a field explicitly. For instance, let’s say you have a JSON object with the following data.
{ "myDate" : "May 3, 2021", "myBool": "true", "myNumber" : "15338" }You can convert those string types into other types using the --type option.
fauna import \
  --path=./myTest.json \
  --type=myDate::date \
  --type=myBool::bool \
  --type=myNumber::number
Run the previous command and notice that the strings are correctly typed in your database.
// Inserted Document in Fauna Collection
{
  "ref": Ref(Collection("myTest"), "327854460251406927"),
  "ts": 1648925228305000,
  "data": {
    "myDate": Time("2021-05-03T04:00:00Z"),
    "myBool": true,
    "myNumber": 15338
  }
}
Values are saved as a string when you don’t specify a type. You can also convert some of the fields and leave the rest as strings. The following command only converts the date type and leaves the rest as strings.
fauna import \
  --path=./myTest2.json \
  --type=myDate::date \
The inserted document looks as follows.
{
  "ref": Ref(Collection("myTest2"), "327854850787246673"),
  "ts": 1648925600740000,
  "data": {
    "myDate": Time("2021-05-03T04:00:00Z"),
    "myBool": "true",
    "myNumber": "15338"
  }
}
Notice, only the date is converted to proper Date format everything else is a string.
Importing multiple files at once
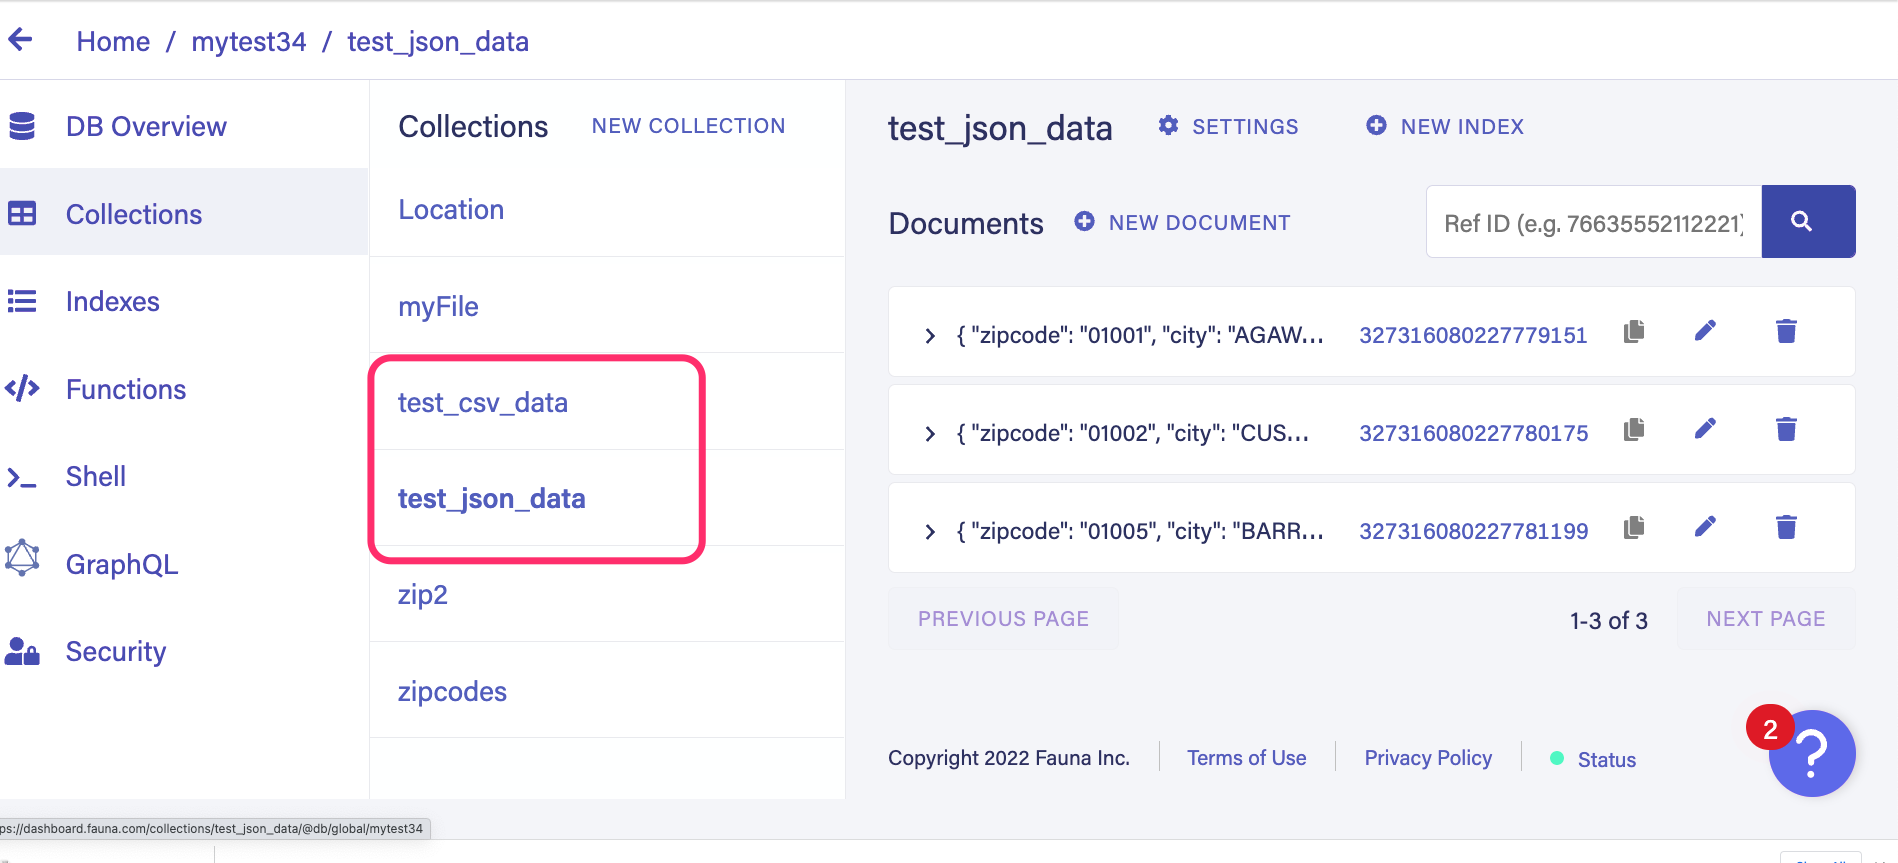
Finally, you also have the option to import multiple files at once. Create a new directory called source_files. Inside the directory, create two files called test_json_data.json and test_csv_data.csv. Add the following content to the files.
// test_json_data.json
[
	{ "zipcode" : "01001", "city" : "AGAWAM", "pop" : 15338, "state" : "MA" },
	{ "zipcode" : "01002", "city" : "CUSHMAN", "pop" : 36963, "state" : "MA" },
	{ "zipcode" : "01005", "city" : "BARRE", "pop" : 4546, "state" : "MA" }
]
// test_csv_data.csv
"zipcode","city","pop","state"
"01001","AGAWAM",15338,"MA"
"01002","CUSHMAN",36963,"MA"
"01005","BARRE",4546,"MA"
Run the following command to import the directory's contents into your database.
fauna import --path=./source_filesHead over to the Fauna dashboard and notice that a collection is created for each file.
Importing large datasets
You can process large and complex datasets with the import feature as well. Download this example data set. Notice that this file has over 3500 JSON objects. Each object is a nested JSON object. The import feature can operate on this complex dataset and import it. Run the following command to test this out.
fauna import --path=./restaurants.json# result
...
25196 documents imported from ./restaurants.json to restaurants
25275 documents imported from ./restaurants.json to restaurants
25355 documents imported from ./restaurants.json to restaurants
25435 documents imported from ./restaurants.json to restaurants
› Success: Import from ./restaurants.json to restaurants completed
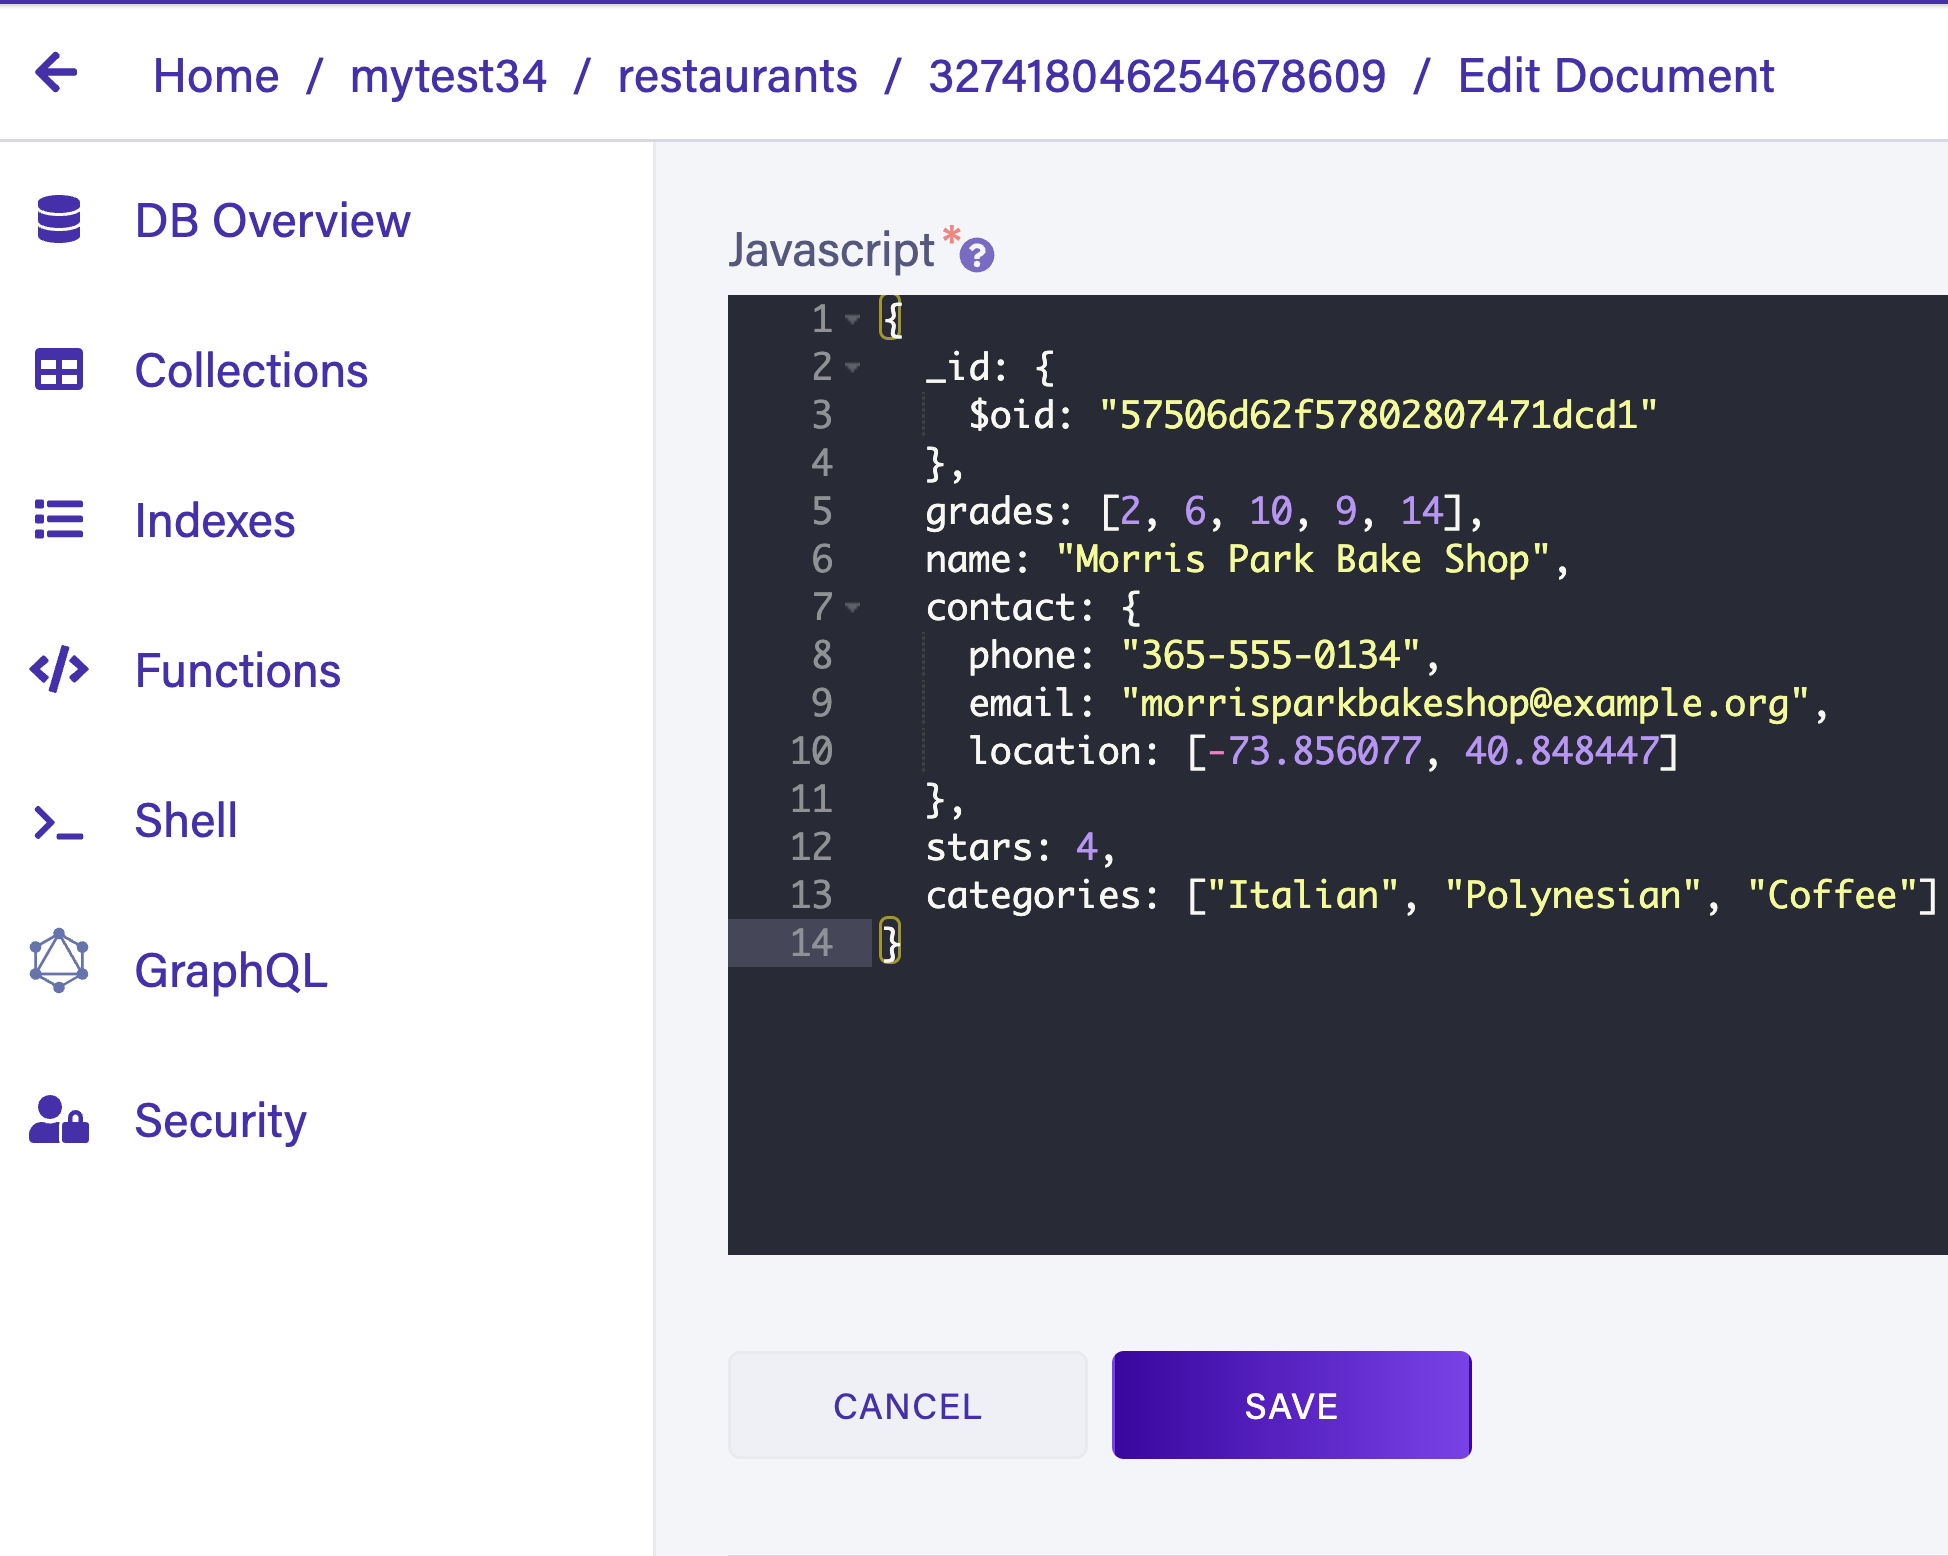
Head back to the Fauna dashboard and open a document in the newly created restaurants collection. Notice that each document in the collection is stored without any data loss.
Get started with Fauna today
For more information on the data import feature, visit the official documentation page. Data import is a powerful feature that you can use to automate your database workflows, data pipelines, and migrations. We can’t wait to see what you build with Fauna’s import feature.
Start importing production data from your existing databases to power your applications with Fauna or import sample data to learn Fauna today. To get started, signup for free!
The Fauna service will be ending on May 30, 2025. For more information, read the announcement and the FAQ.
Subscribe to Fauna's newsletter
Get latest blog posts, development tips & tricks, and latest learning material delivered right to your inbox.